Replacing seat covers in your car is a smart way to keep your seats clean and fresh. Old seat covers can get dirty or torn. New covers can make your car look better.
You do not need to spend a lot of money or go to a shop. You can replace the seat covers yourself. This guide will help you step by step. It is easy to follow, and you will save money.
Credit: www.theseatshop.com
Why Replace Seat Covers?
Seat covers protect your car seats. They stop dirt, water, and damage. Over time, seat covers can wear out. They can get holes or stains.
Replacing them makes the car look nice again. It also helps keep the seats safe. New covers can be soft and comfortable. They can also add style to your car.
What You Need Before You Start
Before you replace seat covers, get these tools and items:
- New seat covers (make sure they fit your car model)
- Flathead screwdriver
- Needle and thread or a sewing kit (optional)
- Scissors
- Cleaning cloth
- Vacuum cleaner (optional)
Make sure you have a clean space to work in. It helps to have good light. This way, you can see what you are doing.
Step 1: Remove the Old Seat Covers
Start by cleaning the seats. Use a vacuum cleaner or cloth to remove dust. This keeps dirt from going under the new covers. Now, find the old seat cover edges.
They may be held by clips, hooks, or zippers. Use the flathead screwdriver to gently open clips. Pull out any hooks carefully.
If the old covers are stuck, do not pull hard. You can break the seat or clips. Take your time. Slowly pull off the old covers from the seat.
If there are zippers, unzip them fully. When the old covers are off, check the seat for any damage.
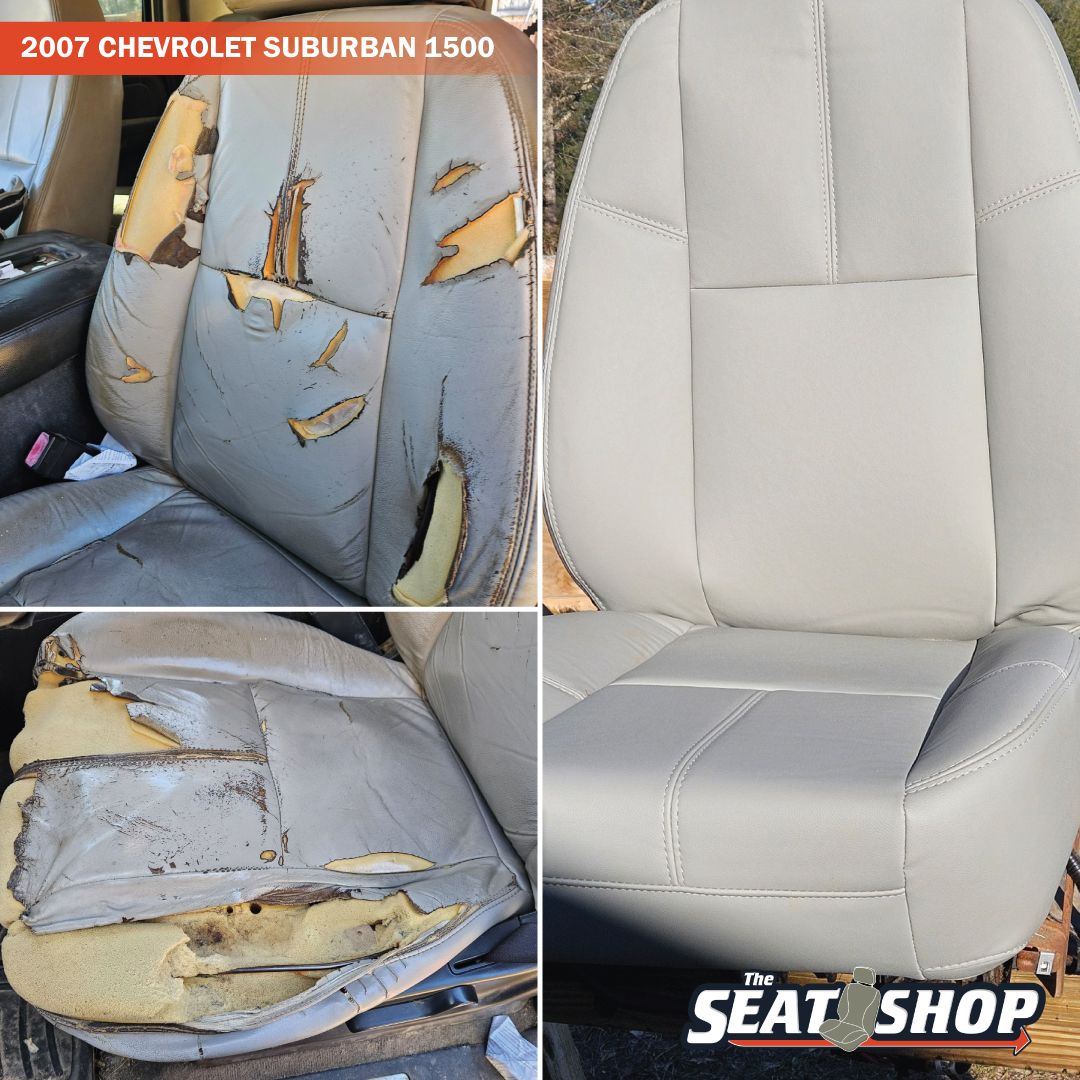
Credit: www.cover-company.com
Step 2: Clean the Car Seats
After removing the old covers, clean the seats again. Use a damp cloth to wipe the seat surface. If the seats are leather, use special leather cleaner.
For fabric seats, use a mild soap solution. Let the seats dry before putting new covers on. Dry seats help the new covers fit well.
Step 3: Prepare the New Seat Covers
Take the new seat covers out of the package. Check if they have instructions. Look at the labels to see front and back. Some covers have tags to show which side is up.
Spread the covers on a clean surface. This helps to see the shape and size. Make sure they match your car seats.
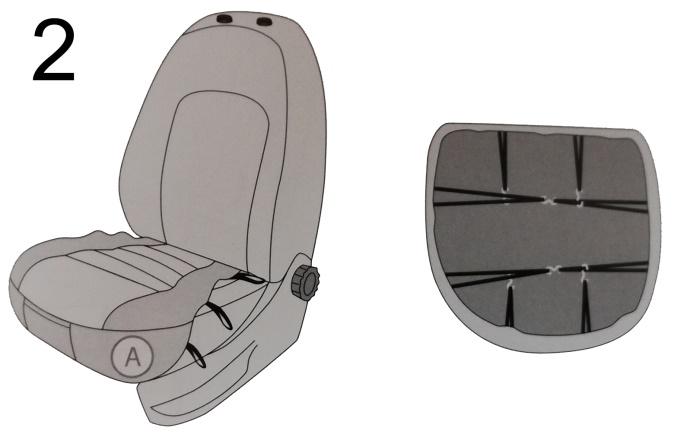
Step 4: Fit the New Seat Covers
Start with the bottom part of the seat. Pull the cover over the seat cushion. Make sure it fits tight and smooth. Tuck the edges into the seat creases.
Use your hands to push the cover down firmly. Next, cover the seat backrest. Pull the cover over the seat back. Adjust it so no wrinkles show.
Some seat covers come with hooks or straps. Use them to hold the cover tight. Hook the straps under the seat frame or through holes.
Pull the straps tight and secure them. If your cover has a zipper, zip it up carefully. Do not force it if it is stuck.
Step 5: Secure the Seat Covers
Make sure the seat covers are tight and do not move. Loose covers can be uncomfortable. They may also slide when you sit. Check all sides of the seat cover.
Use extra hooks or straps if the cover has them. If you want, sew small parts for extra hold. Use needle and thread to fix loose areas.
Step 6: Replace the Headrest Covers
If your car has headrest covers, replace them too. Remove the headrest by pulling it up. Put the new cover on the headrest.
Make sure the cover fits well. Slide the headrest back in place. Repeat for all headrests in the car.
Step 7: Final Check
Now, sit on the seats and check the covers. Are they tight and comfortable? Do they cover all parts of the seat? Look for wrinkles or loose spots.
Fix any problems by adjusting the cover or straps. Clean the outside of the new covers with a cloth.
Tips for Choosing Seat Covers
Choosing the right seat covers is important. Here are some tips:
| Tip | Why It Matters |
|---|---|
| Choose the right size | Seat covers must fit your car seats well |
| Pick durable material | Lasts longer and protects better |
| Consider easy cleaning | Some materials are simple to clean |
| Look for comfortable fabric | You spend hours sitting in your car |
| Match your car style | New covers can improve your car’s look |
Common Problems and How to Fix Them
- Cover is loose: Tighten straps or sew parts.
- Zipper stuck: Use soap or wax to ease it.
- Cover wrinkles: Pull and tuck edges carefully.
- Headrest cover too small: Check size before buying.
Benefits of Replacing Seat Covers Yourself
Doing this job yourself has many benefits:
- You save money on labor costs.
- You learn a useful skill.
- You can choose the style you like.
- You can replace covers anytime.
- You protect your car seats better.
Frequently Asked Questions
How Do I Remove Old Seat Covers Safely?
Unclip and unfasten all clips and hooks gently to avoid damage.
What Tools Are Needed To Replace Car Seat Covers?
Basic tools like screwdrivers, pliers, and a wrench help remove seats and covers.
Can I Install Seat Covers Without Removing Car Seats?
Yes, but removing seats makes installation easier and cleaner.
How Long Does It Take To Replace Car Seat Covers?
Usually, it takes 1 to 2 hours depending on experience.
Conclusion
Replacing seat covers in your car is easy. It takes time and care, but anyone can do it. Follow the steps above for best results. New covers keep your seats clean and comfortable. They also make your car look nice.
Remember to choose the right covers. Take your time when fitting them. Soon, your car will have fresh, new seats.
Try it yourself and enjoy a clean car interior today!

Sudatta is a passionate automotive enthusiast and expert in the field. With a keen eye for detail and a love for all things automotive, he shares insightful articles and reviews to ignite the automotive passion in readers.