Seat cushion covers help protect your cushions. They also make chairs look nice. Making your own covers is easy.
It can save money and let you choose colors and patterns you like. This guide will show you how to make seat cushion covers step by step.
What You Need to Make Seat Cushion Covers
Before you start, gather these materials:
- Fabric (cotton or polyester works well)
- Measuring tape
- Scissors
- Thread matching your fabric
- Sewing needle or sewing machine
- Pins
- Velcro strips or zipper (optional)
- Iron (optional, but helpful)
Make sure your fabric is clean and dry before you begin.
Step 1: Measure Your Seat Cushion
Start by measuring your cushion. You need three measurements:
- Length
- Width
- Height (thickness of the cushion)
Write down these numbers. You will use them to cut the fabric.
Step 2: Add Extra Fabric for Sewing
To sew the cover, you need to add extra fabric. Add 1 inch on all sides to your measurements. This extra space is for sewing seams.
For example, if your cushion is 18 inches long, cut fabric 20 inches long.
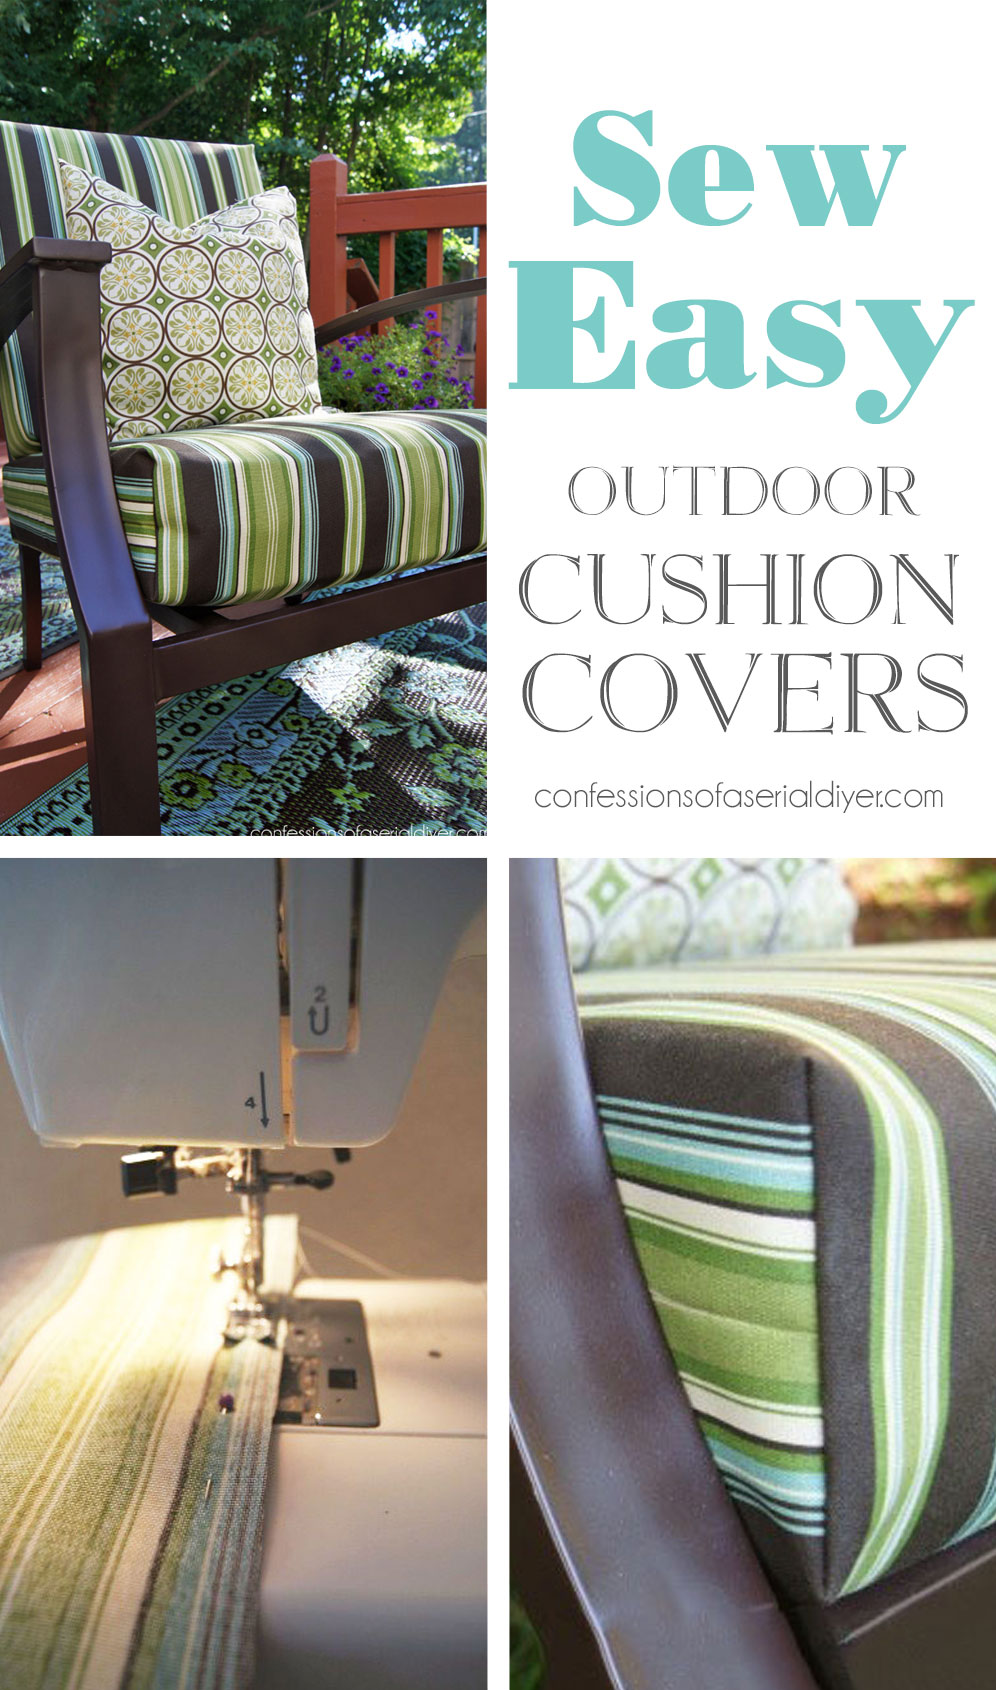
Credit: www.confessionsofaserialdiyer.com
Step 3: Cut the Fabric Pieces
You will need to cut fabric for the top, bottom, and sides of the cover.
- Top piece: Cut a rectangle using the length and width plus 2 inches.
- Bottom piece: Same size as the top piece.
- Sides: Cut four strips. Each strip’s size is the length or width plus 2 inches for seams, and height plus 2 inches.
Example: For 18×18 inch cushion and 3 inch height, cut four strips:
- Two strips: 20 inches by 5 inches (for length sides)
- Two strips: 20 inches by 5 inches (for width sides)
Step 4: Pin the Fabric Pieces Together
Lay the top piece flat on a table. Pin the side strips around the top piece edges. The right side of the fabric should face inward.
Pin carefully to keep fabric edges even. Then pin the bottom piece to the side strips. Make sure the right side faces inward.
Step 5: Sew the Pieces
Use a needle and thread or a sewing machine. Sew along the pinned edges. Use a straight stitch and a 1/2 inch seam allowance.
Leave one side open if you want to insert the cushion later. This opening is for the zipper or velcro.
Step 6: Add Closure (Velcro or Zipper)
You can add velcro or a zipper to close the cover. This lets you remove the cover for washing.
- Velcro: Sew velcro strips to the open edge.
- Zipper: Sew the zipper into the open edge.
If you do not want a removable cover, sew all edges closed.
Step 7: Turn the Cover Inside Out
After sewing, turn the cover right side out. Use your fingers or a pencil to push out corners.
Iron the cover to make it smooth. This step is optional but makes the cover look neat.
Step 8: Put the Cushion Inside
Slip your cushion inside the cover. Close the velcro or zipper. Your cushion cover is ready to use.
Tips for Making Seat Cushion Covers
- Choose durable fabric for long use.
- Pick colors that match your room.
- Wash fabric before sewing to avoid shrinking.
- Use sharp scissors to cut fabric cleanly.
- If new to sewing, practice on scrap fabric first.
- Use pins to keep fabric in place while sewing.
- Take your time. Sewing neat seams makes the cover look better.
Different Styles of Seat Cushion Covers
You can make covers in many styles. Here are some examples:
- Pillow-style covers: Simple covers with one piece of fabric and elastic.
- Envelope covers: Covers with overlapping fabric at the back. No zipper needed.
- Zipper covers: Covers with zipper for easy removal.
Choose the style that fits your cushion and skill level.
Why Make Your Own Seat Cushion Covers?
Making covers yourself has many benefits:
- You save money compared to buying ready-made covers.
- You control the fabric and design.
- You can replace old covers anytime.
- It is a fun, creative activity.
Common Mistakes to Avoid
- Not measuring the cushion carefully.
- Forgetting to add seam allowance.
- Cutting fabric unevenly.
- Using weak thread or dull needle.
- Not securing fabric well with pins.
- Skipping the step to turn the cover inside out.
Check each step carefully to avoid these mistakes.
Summary Table: Steps to Make Seat Cushion Covers
| Step | What to Do |
|---|---|
| 1 | Measure the cushion length, width, and height. |
| 2 | Add 1 inch for seams to each measurement. |
| 3 | Cut fabric pieces: top, bottom, and sides. |
| 4 | Pin fabric pieces together with right sides facing in. |
| 5 | Sew the pieces, leaving an opening if needed. |
| 6 | Add velcro or zipper to the opening. |
| 7 | Turn the cover inside out and iron it. |
| 8 | Put the cushion inside and close the cover. |
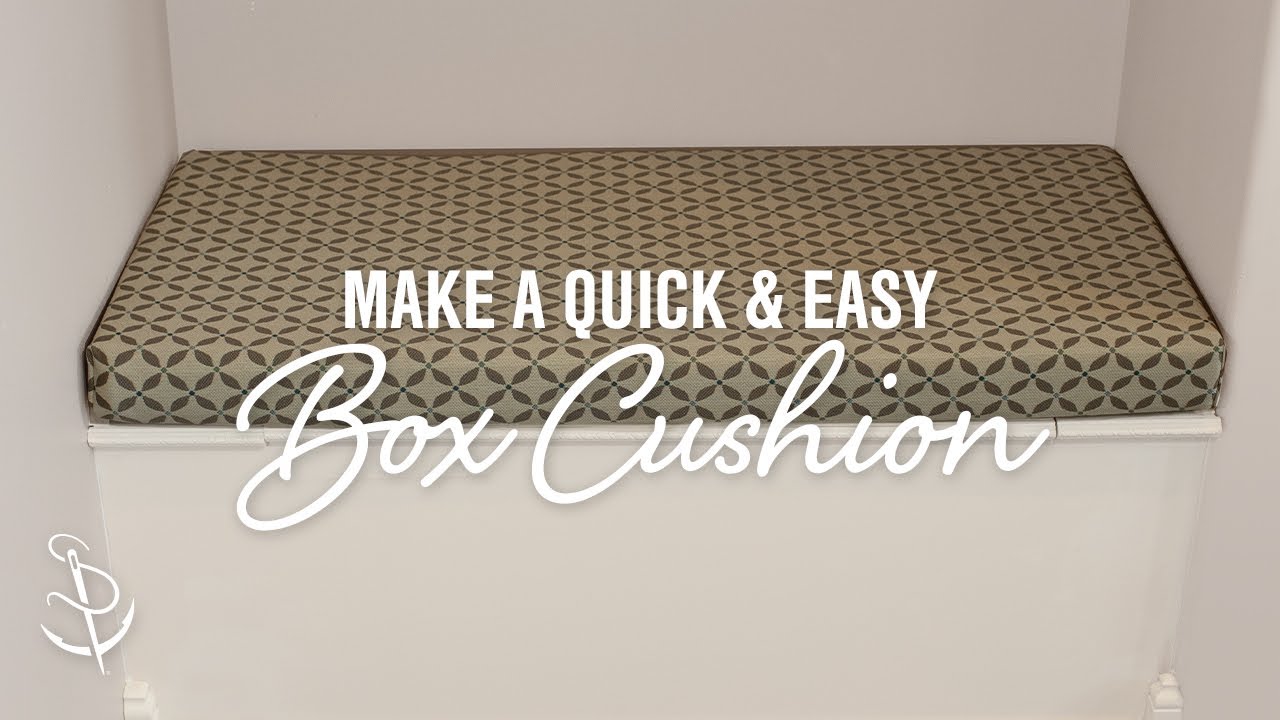
Credit: www.youtube.com
Final Thoughts
Making seat cushion covers is a simple project. You do not need many tools or skills. Follow the steps carefully and take your time. The result will be a nice, clean cushion cover that fits your style. Try making one today. You will enjoy the process and the new look of your chairs.
Frequently Asked Questions
What Materials Are Best For Making Seat Cushion Covers?
Cotton and polyester fabrics work best for seat cushion covers. They are durable, easy to clean, and comfortable to use.
How Do I Measure My Seat Cushion For A Cover?
Measure the length, width, and thickness of your cushion. Add an inch for seam allowance to get a perfect fit.
Can I Use A Sewing Machine For Seat Cushion Covers?
Yes, a sewing machine makes stitching faster and neater. Hand sewing is possible but takes more time and effort.
How Do I Choose Fabric Color For Seat Cushion Covers?
Pick colors that match your room decor or furniture. Dark colors hide stains better, while light colors brighten the space.

Sudatta is a passionate automotive enthusiast and expert in the field. With a keen eye for detail and a love for all things automotive, he shares insightful articles and reviews to ignite the automotive passion in readers.