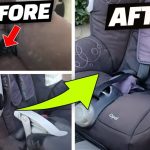
Car seat covers protect your car seats from dirt and damage. They also make your car look nice. Buying covers can be expensive. Making your own is a good idea.
It is fun and saves money. This guide will show you how to make car seat covers step by step. You do not need special skills. Just follow the simple steps.
What You Need to Make Car Seat Covers
Before you start, you need some materials and tools. Here is a list:
- Fabric – Choose a strong and soft fabric.
- Measuring tape – To measure your car seats.
- Scissors – For cutting the fabric.
- Needle and thread or sewing machine – To sew the fabric.
- Chalk or fabric marker – To mark the fabric.
- Elastic bands or Velcro – For fixing covers on seats.
- Paper – To make patterns.
Step 1: Measure Your Car Seats
First, you must measure your car seats well. This is very important. If the covers are too big or small, they will not fit. Use the measuring tape to get these sizes:
- Height of the seat back.
- Width of the seat back.
- Height of the seat bottom.
- Width of the seat bottom.
- Depth of the seat bottom.
Write down all these numbers. Add 2 to 4 inches to each measurement for sewing space.
Credit: www.chicaandjo.com

Credit: www.youtube.com
Step 2: Make a Paper Pattern
Next, use paper to make a pattern. This helps you cut the fabric right. Draw the shape of the seat back on the paper.
Then, draw the shape of the seat bottom. Use your measurements. Cut the paper shapes out. You can adjust the paper pattern if needed.
Step 3: Choose the Right Fabric
Pick a fabric that is strong and easy to clean. Some good choices are:
- Canvas
- Leatherette
- Faux leather
- Denim
These fabrics last long and protect seats well. Avoid thin fabrics that tear easily.
Step 4: Cut the Fabric
Put your paper pattern on the fabric. Use chalk or a fabric marker to trace the pattern. Cut the fabric carefully along the lines.
Remember to cut two pieces for each seat part (back and bottom). This is because you will sew them together.
Step 5: Sew the Pieces Together
Now, sew the fabric pieces. Place two pieces with the right sides facing each other. Sew along the edges, leaving one side open.
This open side is to put the cover on the seat. Use a sewing machine or needle and thread. Make sure the stitches are strong.
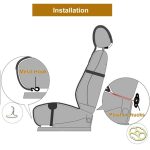
Step 6: Add Elastic Bands or Velcro
To keep the cover in place, add elastic bands or Velcro. Elastic bands go around the seat bottom.
Sew the bands on the edges of the fabric. Velcro can be sewn on the sides or back. This helps the cover stay tight on the seat.
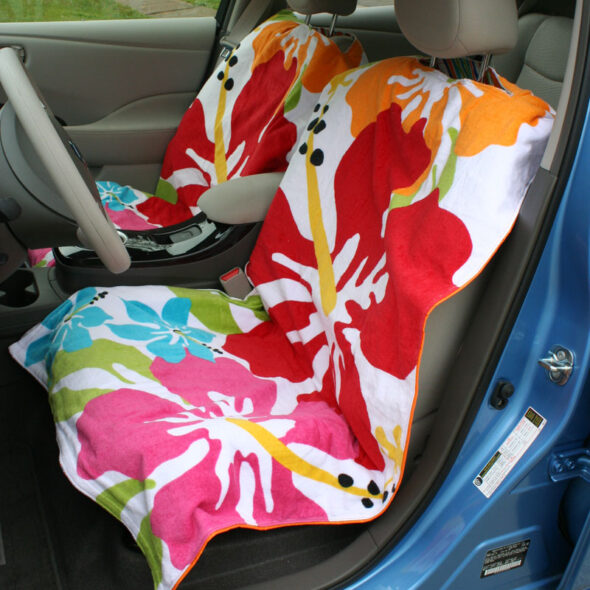
Step 7: Try the Cover on Your Car Seat
After sewing, put the cover on your seat. Check if it fits well. If it is loose, adjust the elastic bands or Velcro. If it is too tight, you may need to make a new cover with bigger measurements.
Extra Tips for Making Car Seat Covers
- Use fabric that matches your car interior color.
- Wash the fabric before sewing to avoid shrinking.
- Use waterproof fabric if you want to protect against spills.
- If you do not have a sewing machine, hand sewing works too.
- Take your time when measuring and cutting to avoid mistakes.
Why Make Your Own Car Seat Covers?
Making car seat covers has many benefits. Here are some:
- Save money: Buying covers can be expensive.
- Custom fit: You get covers that fit your seats perfectly.
- Choose your style: Pick colors and fabrics you like.
- Protect your seats: Covers keep seats clean and safe from damage.
- Fun project: It is a nice hobby and learning experience.
How to Care for Your Car Seat Covers
After making your covers, keep them clean. Here are some care tips:
- Remove covers and wash them regularly.
- Use mild soap and cold water for washing.
- Do not use bleach or strong chemicals.
- Air dry covers; avoid direct sunlight.
- Check elastic bands and Velcro for wear and replace if needed.
Summary Table: Steps to Make Car Seat Covers
| Step | What to Do | Tips |
|---|---|---|
| 1 | Measure car seats carefully | Add extra inches for sewing |
| 2 | Make paper patterns for seats | Adjust if needed before cutting |
| 3 | Choose strong, easy-to-clean fabric | Wash fabric before cutting |
| 4 | Cut fabric using patterns | Cut two pieces per seat part |
| 5 | Sew fabric pieces together | Leave one side open for fitting |
| 6 | Add elastic bands or Velcro | Helps cover fit tightly |
| 7 | Try cover on car seat | Adjust if needed |
Final Thoughts
Making car seat covers is simple with the right steps. You can protect your car and save money. Use good fabric and measure well.
Take your time sewing the covers. Soon, your car will look fresh and clean. Give it a try. You will feel proud of your work.
Frequently Asked Questions
What Materials Do I Need To Make Car Seat Covers?
You need fabric, foam padding, scissors, sewing machine, thread, and measuring tape.
How Long Does It Take To Sew Car Seat Covers?
It usually takes 2 to 4 hours, depending on skill and design.
Can I Make Waterproof Car Seat Covers At Home?
Yes, use waterproof fabric like vinyl or coated polyester for water resistance.
What Is The Best Fabric For Car Seat Covers?
Durable fabrics like neoprene, leatherette, or heavy cotton work best for protection.

Sudatta is a passionate automotive enthusiast and expert in the field. With a keen eye for detail and a love for all things automotive, he shares insightful articles and reviews to ignite the automotive passion in readers.