If you own a Tesla Model S, you know it is a special car. It runs on electricity and has many smart features. But like all cars, it needs regular care. One important part is the air filter. The air filter keeps the air inside clean.
Over time, it gets dirty. This can make the air inside less fresh. It can also make the car work harder. So, changing the air filter is very important.
This article will show you how to change the Tesla Model S air filter. It is easy to do by yourself. You will save money and keep your car fresh. Let’s start!

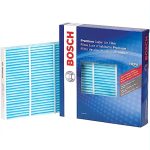
Credit: teslaservice.la
What is an Air Filter?
The air filter cleans the air that enters your car’s cabin. It stops dust, pollen, and dirt from coming inside. This helps people inside breathe better. It also protects the car’s air system from damage.
In a Tesla Model S, the air filter works with the heating and cooling system. When the filter is dirty, air flow slows down. The car may smell bad or feel less comfortable. Changing the filter fixes these problems.
How Often Should You Change the Air Filter?
Tesla recommends changing the air filter every 2 years or 25,000 miles (40,000 kilometers).
But if you drive in dusty places, change it more often. You can check the filter by looking inside. If it looks dirty or dark, it needs changing.
Changing it on time keeps your car smelling fresh and the air clean.
Tools and Materials You Will Need
Before you start, gather these tools and parts:
- New air filter for Tesla Model S
- Flat screwdriver or plastic pry tool
- Clean cloth or paper towels
- Gloves (optional)
Make sure you buy the right air filter. Check your Tesla Model S year and model to get the correct part.
Step-by-Step Guide to Change the Air Filter
Step 1: Prepare Your Car
Park your Tesla Model S on a flat surface. Turn off the car and open the front trunk (called the “frunk”).
Make sure the car is cool. The air filter is near the frunk, so you need space to work.
Step 2: Locate The Air Filter Cover
Inside the frunk, look for a black plastic cover. It is near the windshield, close to the back of the frunk area.
This cover holds the air filter. You will remove it to get the old filter out.
Step 3: Remove The Air Filter Cover
Use a flat screwdriver or a plastic pry tool to gently lift the cover. Be careful not to break the clips.
The cover may snap off with little force. Put the cover in a safe place.
Step 4: Take Out The Old Air Filter
Now you see the air filter inside. It looks like a rectangular piece with pleats.
Hold the filter and pull it out slowly. If it is tight, wiggle it gently to free it.
Step 5: Clean The Filter Area
Use a clean cloth or paper towel to wipe dust or dirt inside the filter space. This helps the new filter fit better.
Do not use water or liquids. Just dry cleaning is enough.
Step 6: Insert The New Air Filter
Take your new air filter. Look for arrows or marks showing the airflow direction. Usually, the arrows point toward the car cabin.
Place the new filter gently into the space. Make sure it fits fully and sits flat.
Step 7: Replace The Cover
Put the black cover back on the air filter area. Press it until you hear clips snap into place.
Check if the cover is secure. It should not move or come off easily.
Step 8: Close The Frunk
After you finish, close the frunk slowly. Make sure it is locked properly.
Your Tesla Model S air filter is now changed!

Credit: www.youtube.com
Tips for Better Air Filter Care
- Change the air filter every 2 years or sooner if dirty.
- Keep your car clean to reduce dirt in the filter.
- Check the filter if you smell bad air or feel less airflow.
- Use only Tesla-approved air filters for best fit and quality.
- Wear gloves if you do not want dirty hands.
Why Change the Air Filter Yourself?
Changing the air filter yourself saves money. You do not need to pay for labor.
It is also easy and does not take long. Most people do it in 15 to 30 minutes.
You learn more about your Tesla and feel good about caring for it.
Signs Your Air Filter Needs Changing
How do you know if the air filter is bad? Here are signs to watch for:
| Sign | What It Means |
|---|---|
| Bad smell inside the car | Filter may be dirty or moldy |
| Less air coming from vents | Filter is clogged and blocks air flow |
| Dust or pollen inside car | Filter is not working well |
| Noise from air system | Filter is dirty and air struggles to pass |
If you see any of these signs, it is time to change your filter.
Final Thoughts
Changing the Tesla Model S air filter is simple and quick. It helps keep your car fresh and clean. You do not need special tools or skills.
Follow the steps in this guide carefully. Take your time and be gentle with parts. Buy the right filter for your model.
Regular filter changes protect your health and your car’s system. Enjoy clean air inside your Tesla every time you drive.
Now you know how to change your Tesla Model S air filter. Try it yourself and keep your car fresh.
Frequently Asked Questions
How Often Should I Change Tesla Model S Air Filter?
Change the air filter every 2 years or 25,000 miles for clean cabin air.
What Tools Are Needed To Replace Tesla Model S Air Filter?
A Torx screwdriver and a flathead tool usually work for filter replacement.
Can I Change Tesla Model S Air Filter Myself?
Yes, it’s a simple task that most owners can do without help.
How Long Does It Take To Change Tesla Model S Air Filter?
The process usually takes about 10 to 15 minutes.

Sudatta is a passionate automotive enthusiast and expert in the field. With a keen eye for detail and a love for all things automotive, he shares insightful articles and reviews to ignite the automotive passion in readers.